Sightless

Sightless Writeup
Table of Contents
1. Initial Foothold Exploration
Identifying the target’s IP address is crucial for initiating the hack. Utilize NMap scans to discover open ports and services. Enumerate services using tools like Gobuster to unveil potential vulnerabilities. Thorough reconnaissance sets the foundation for a successful invasion.
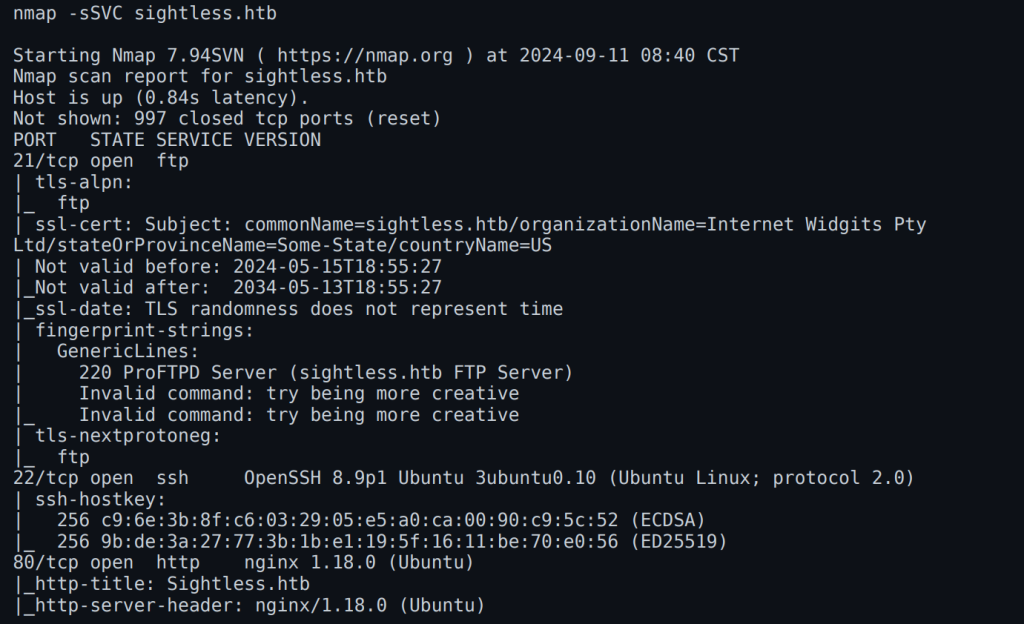
NMap Scan
Let’s perform an NMap scan to identify open ports and services.
NMap scan result of sightless.htb:
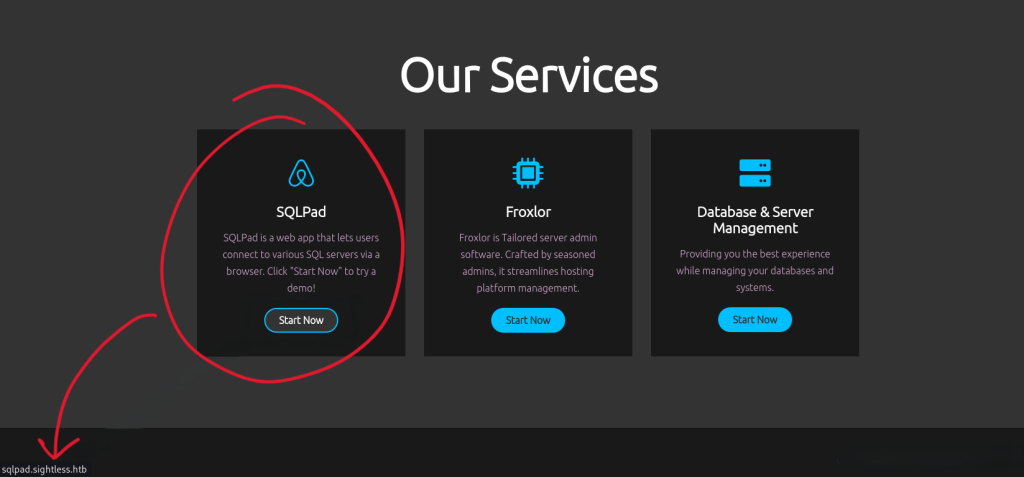
Focusing on port 80 reveals an HTTP service hosting a web application. Further analysis of the service uncovers a redirection to sqlpad.sightless.htb. Add sqlpad.sightless.htb to your /etc/hosts file for continued investigation.
Sightless.htb Homepage
The homepage and services page of the target provide minimal information, but the SQLPad service proves crucial.
2. Identifying Vulnerabilities
Perform extensive scans and use tools like BurpSuite to analyze the SQLPad service. The installed version, 6.10.0, is affected by CVE-2022-0944, allowing potential exploitation.
SQLPad Vulnerability
Vulnerability Details:
- CVE: CVE-2022-0944
- Impact: Exploitable SQLPad service
- Version: 6.10.0
3. Exploiting the Vulnerabilities
Database Connection Setup
- Navigate to the SQLPad “Connection” menu.
- Create a new connection:
- Choose MySQL as the database type.
- Input a crafted payload in the database fields.
- Test and establish the connection.

Now we need to create the following payload to establish a connection with the database:

Gaining User Access
Analysis reveals the presence of .dockerenv, indicating the application is running in a Docker container. Two users, michael and node, were identified. Extract the shadow file, crack the hash for Michael, and log in using the credentials:
- Username:
michael - Password:
insaneclownposse
SSH as Michael to retrieve the user flag:
1
2
ssh michael@<target_ip>
cat /home/michael/user.txt

4. Root Flag
Investigate port 8080, which reveals Froxlor running. Use Chrome Remote Debugger to capture credentials and access the Froxlor dashboard.
Steps to Gain Root Access
After logging in, navigate to the “PHP” section, then go to “PHP-FPM versions” and create a new version. In the PHP-FPM restart command field, input the following command:
1
2
3

cp /root/root.txt /tmp/root.txt
chmod 644 /tmp/root.txt
Save the configuration and then go to http://127.0.0.1:8080/admin_settings.php?start=phpfpm. Disable PHP-FPM and save the changes, then re-enable it and save again. This will trigger the execution of the copy command. SSH as root using the id_rsa key:
1
2
3
Copiar código
ssh -i id_rsa root@<target_ip>
cat /root/root.txt
